Prompt Packs / Character Consistency Pipeline
PYROS AI Creative
Character Consistency Pipeline
Create production-ready AI characters for images, videos and short movies.
Learn how to build a complete Character Reference Pack that keeps your AI character consistent across every scene, camera angle and generation.
Overview
What You'll Build
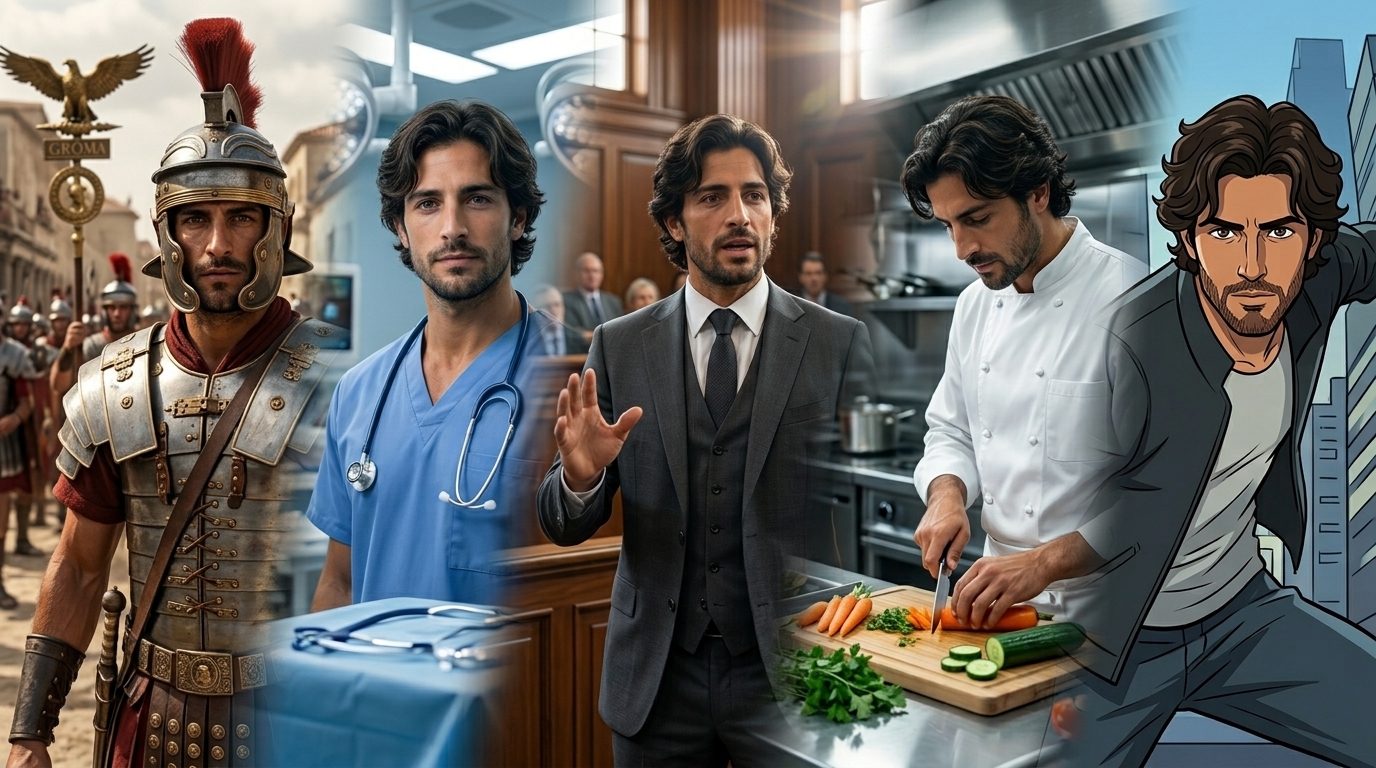
By following this workflow you'll create two production-ready reference sheets that keep your AI character visually consistent across images, videos and future productions.
Face Reference Sheet
Complete facial references including front, left, right, back and eye close-up views.
Character Reference Sheet
Professional full-body references ready for consistent AI image and video generation.
These reference sheets become your permanent visual foundation for future AI image and video generation.
Before You Start
Think About Your Character First
Before using these prompts, think about your character.
You don't need every detail.
Even a simple idea like "A retired knight hunting monsters." or "A cyberpunk detective." is enough.
The Character Blueprint prompt will intelligently fill the missing information while keeping everything visually consistent.
Phase 1
Character Design
Create the complete identity of your character.
- 1. Paste your screenplay, story, or scene into ChatGPT (or any AI text generator you use). This gives the AI important context about your world, genre, tone, and the character's role before creating the Character Blueprint.
- 2. Fill in the Character Blueprint Template Prompt with the details you already know, such as the character's appearance, personality, profession, or backstory.
- 3. Leave any fields you're unsure about blank. The AI will intelligently infer the missing details while keeping everything consistent with your story and the information you've already provided. The more context you provide, the more accurate and believable your final character will be.
- 4. Paste the completed Character Blueprint Template Prompt into ChatGPT.
Character Blueprint Template Prompt
You are an expert Character Designer and Concept Artist.
Your task is to create a complete Character Blueprint for an AI-generated character.
The user may provide as much or as little information as they want.
Whenever information is missing, infer the most suitable details based on the story, genre, personality, and overall context.
Keep every choice internally consistent.
The goal is to create a believable, visually memorable character that can later be used to generate consistent AI images and videos.
Complete every field below.

Character Description:
[Which character from your story?]

-------------------------

# CHARACTER OVERVIEW
Name:
Age:
Gender:
Occupation:
Role in the story:

# APPEARANCE
Ethnicity:
Height:
Build:
Body Type:
Skin Tone:

# FACE
Face Shape:
Jawline:
Nose:
Eye Color:
Eye Shape:
Eyebrows:
Lips:
Ears:
Facial Hair (if applicable):
Distinctive Features:

# HAIR
Color:
Length:
Style:
Texture:

# EXPRESSION
Default Expression:
Personality:
Overall Energy:

# CLOTHING
Top:
Bottom:
Shoes:
Outerwear:
Color Palette:

# ACCESSORIES
Jewelry:
Weapons:
Other Accessories:

# SIGNATURE FEATURES
[List 3–5 special visual traits]
Now you have a complete Character Blueprint that we can use to create your first image generation prompt.
Phase 2
Master References
This phase creates the two most important images. Never skip this step. Everything that follows depends on these references.
Step 1 — Master Reference Portrait
Generate a prompt that will create a detailed image generation prompt for your main character's face.
- 1. Add the Character Blueprint you just generated to the Master Reference Portrait Template Prompt below.
- 2. Paste the completed prompt into ChatGPT.
- 3. Copy the image generation prompt that ChatGPT creates.
- 4. Paste it into Nano Banana 2 or Nano Banana Pro.
- 5. Generate multiple portrait variations until you're completely satisfied with the result.
This portrait will serve as the facial reference for your entire Character Consistency Pipeline.
Master Reference Portrait Template Prompt
You are an expert AI prompt engineer specializing in photorealistic character creation.

Using the Character Blueprint below, generate a single optimized image prompt for creating the character's Hero Portrait.

The portrait will be used as the master reference portrait for maintaining character consistency throughout an entire AI filmmaking workflow.

Requirements:
• Use every relevant visual detail from the Character Blueprint.
• Preserve the character's identity exactly.
• Do not invent or change facial features unless they are missing from the Blueprint.
• The character must look natural, believable and highly photorealistic.

Portrait Specifications:
• Single character only.
• Looking directly into the camera.
• Neutral facial expression.
• Relaxed posture.
• Shoulders squared toward the camera.
• Head perfectly upright.
• Eyes looking straight into the lens.
• Mouth gently closed.
• No exaggerated emotion.

Framing:
• Centered composition.
• Head and upper shoulders visible.
• Portrait orientation.

Background:
• Pure seamless white studio background.
• No shadows on the background.
• No objects.
• No textures.
• No gradients.

Lighting:
• Professional soft studio lighting.
• Large softboxes from both sides.
• Soft frontal fill light.
• Even illumination across the entire face.
• No harsh shadows.
• No dramatic lighting.
• Natural skin tones.

Camera:
• Professional DSLR portrait photography.
• 85mm portrait lens.
• Eye-level camera.
• Shallow depth of field.
• Sharp focus on both eyes.
• Extremely detailed skin texture.
• Natural color grading.

Image Quality:
Ultra-photorealistic.
High detail.
Natural skin pores.
Realistic eyes.
Professional portrait photography.
Clean composition.

Output only the final image prompt.

Character Blueprint:

[PASTE THE CHARACTER BLUEPRINT HERE]
Now you have your face image generation prompt and the first front-view portrait of your character's face.
Step 2 — Master Reference Full Body
Generate a prompt that will create a detailed image generation prompt for your main character's full body while preserving the exact facial identity from the Master Reference Portrait.
- 1. Paste the Master Reference Full Body Template Prompt into ChatGPT.
- 2. Copy the image generation prompt that ChatGPT generates.
- 3. Paste the prompt into Nano Banana 2 or Nano Banana Pro, and attach the Master Reference Portrait you generated in the previous step.
- 4. Generate multiple versions if necessary and choose the best result.
The AI will preserve the same facial identity while generating the complete body, including clothing, proportions, and posture.
This image will become the full-body reference for the rest of your Character Consistency Pipeline.
Master Reference Full Body Template Prompt
You are an expert AI prompt engineer specializing in photorealistic character consistency.
Using the attached Master Reference Portrait, recreate exactly the same character.
This image will be used as part of a professional Character Reference Pack for AI filmmaking.
Character Consistency Requirements:

• Preserve the character's identity exactly.
• Do not change facial features, hairstyle, age, ethnicity, body proportions, skin tone, or any defining characteristics.
• The character must be instantly recognizable as the same person in the reference image.

Pose:
• Standing naturally.
• Relaxed posture.
• Arms resting naturally at the sides.
• Feet shoulder-width apart.
• Facing directly toward the camera.
• Entire body visible from head to toe.

Expression:
• Neutral facial expression.
• Looking directly at the camera.

Framing:
• Full-body portrait.
• Entire body visible with comfortable spacing around the character.
• Centered composition.

Wardrobe:
Use clothing that matches the Character Blueprint.
If the character's physique needs to remain visible for future consistency, use simple fitted clothing or minimal neutral clothing appropriate for the character.

Background:
• Pure seamless white studio background.
• No shadows.
• No objects.
• No textures.

Lighting:
• Professional soft studio lighting.
• Even illumination.
• Natural skin tones.
• No dramatic shadows.

Camera:
• Professional DSLR photography.
• 50mm lens.
• Eye-level camera.
• Entire body perfectly in focus.

Image Quality:
Ultra-photorealistic.
Extremely high detail.
Professional studio photography.
Natural color grading.
Sharp facial details.
Phase 3
Generate Every Reference Angle
Create a complete set of reference images covering every important viewing angle of your character. These references will significantly improve character consistency across future AI image and video generations.
Step 1 — Face Reference Set
- 1. Always attach the Master Reference Portrait as the reference image.
- 2. Use the corresponding prompt below to generate each new facial angle while preserving the exact same identity.
- 3. Generate and approve each reference image before moving on to the next one.
Right / Left Side Prompt
Using the attached Master Reference Portrait, recreate exactly the same character.
The only change allowed is the camera angle. Every other visible detail—including facial features, hairstyle, skin tone, age, and expression—must remain exactly the same as the reference image.
Generate a [right/left] profile headshot (90°) on a pure white studio background with a neutral expression
Face Back View Prompt
Using the attached Master Reference Portrait, recreate exactly the same character.
The only change allowed is the camera angle. Every other visible detail—including hairstyle, hair length, hair color, and head proportions—must remain exactly the same as the reference image.
Generate a back view of the character's head and shoulders on a pure white studio background.
Eye Close-up Prompt
Using the attached reference images, recreate exactly the same character.
Generate an extreme close-up of both eyes, preserving every facial detail, including eye color, eyebrows, eyelashes, skin texture, and fine wrinkles. Use the same white studio background and soft studio lighting.
You should now have five reference images of your character's face: a Front View, Left Profile, Right Profile, Back View and Eye Close-up.
Step 2 — Body Reference Set
Now let's do the same for the full body.
- 1. Always attach the Master Reference Full Body together with the corresponding Face Reference image for the angle you want to generate.
- 2. Use the corresponding prompt below to generate each full-body angle while preserving the exact same character identity.
- 3. Generate and approve each reference image before moving on to the next one.
For example:
- • Left Body Profile → Master Reference Full Body + Left Face Profile
- • Right Body Profile → Master Reference Full Body + Right Face Profile
- • Back Body View → Master Reference Full Body + Back Face View
This approach ensures the AI preserves both the character's body proportions and the correct head orientation, resulting in much greater character consistency.
If any reference image looks inconsistent, regenerate only that specific angle before proceeding to the next step.
Full Body Side Profile Prompt
Using the attached reference images, recreate exactly the same character.
The only change allowed is the camera angle. Every other visible detail—including clothing, accessories, props, hairstyle, body proportions, and facial features—must remain exactly the same as the reference images.
Generate a full-body [right/left] profile view (90°) of the character on a pure white studio background with a neutral expression.
Full Body Back View Prompt
Using the attached reference images, recreate exactly the same character.
Generate a full-body back view, preserving the character's hairstyle, clothing, body proportions, and overall appearance. Maintain the same pure white studio background.
You should now have four full-body reference images of your character: a Front View, Left Profile, Right Profile and Back View.
Phase 4
Build the Reference Sheets
Combine all your reference images into clean, professional reference sheets.
Step 1 — Face Reference Sheet
Attach the following images:
- • Front Face
- • Left Face Profile
- • Right Face Profile
- • Back Face View
- • Eye Close-up
The prompt will arrange them into a clean, high-resolution Face Reference Sheet.
Face Reference Sheet Prompt
Using the attached reference images, create a clean professional Face Reference Sheet.
Requirements:
• Use the attached images exactly as they are.
• Do not modify, regenerate, enhance, or reinterpret any image.
• Do not change colors, lighting, facial features, or proportions.
• Simply arrange the images into a clean, symmetrical layout.

Layout:
• Top row: Front View, Left Profile, Right Profile, Back View.
• Bottom row: Large centered close-up of both eyes.

Style:
• Pure white background.
• No text.
• No labels.
• No arrows.
• No borders.
• No logos.
• No graphics.
• Equal spacing between all images.
• Clean professional presentation suitable for an AI Character Reference Pack.

Output a single high-resolution reference sheet.
You should now have a Face Reference Sheet similar to the one shown below.
Step 2 — Character Reference Sheet
Attach the following images:
- • Front Face
- • Left Face Profile
- • Right Face Profile
- • Back Face View
- • Front Full Body
- • Left Full Body Profile
- • Right Full Body Profile
- • Back Full Body View
The prompt will arrange them into a professional Character Reference Sheet, ready to use as a master reference for future AI image and video generation.
Character Reference Sheet Prompt
Using the attached reference images, create a clean, professional Character Reference Sheet.
Requirements:
• Use every attached image exactly as provided.
• Do not modify, regenerate, enhance, upscale, or reinterpret any image.
• Do not change facial features, hairstyle, clothing, accessories, body proportions, colors, lighting, or image quality.
• Simply arrange the images into a clean, balanced reference sheet.

Layout:
Top row:
• Face Front
• Face Left Profile
• Face Right Profile
• Face Back

Bottom row:
• Full Body Front
• Full Body Left Profile
• Full Body Right Profile
• Full Body Back

Style:
• Pure white background.
• No text.
• No labels.
• No titles.
• No arrows.
• No borders.
• No logos.
• No graphics.
• Equal image size within each row.
• Consistent spacing between all images.
• Leave slightly more vertical spacing between the two rows to clearly separate the face references from the full-body references.
• Clean, symmetrical, studio-quality presentation suitable for a professional AI Character Reference Pack.

Output a single high-resolution reference sheet.
You should now have a Character Reference Sheet similar to the one shown below.
Phase 5
Production Ready
Your character is now production-ready.
You now have a complete Character Reference Pack that can be reused across future AI image and video generations while maintaining maximum visual consistency.
Simply attach your Face Reference Sheet or Character Reference Sheet whenever you want to generate realistic images of your character in any situation.
Tips
Tips for Best Results
- • Always keep the same Master Reference Portrait throughout the entire workflow.
- • Never replace your Master References after creating additional angles.
- • Regenerate inconsistent images instead of editing them manually.
- • Save every reference image at the highest available resolution.
- • Use the final Character Reference Sheet whenever your AI image or video model supports image references.
- • Attach the Character Reference Sheet together with any scene-specific references (such as new clothing, props, environments, or poses) to maximize character consistency.
- • If your character's appearance changes during the story (such as new clothing, damaged clothing, armor changes, hairstyles, injuries, scars, dirt, blood, or other permanent visual changes), create an updated Character Reference Sheet that reflects the new look. This helps maintain consistency throughout the rest of the production.